
How to sew a children’s cap – cut and instructions for sewing a cap
Who of you has never worn a baseball cap? Today, a baseball cap is an integral part of every child’s, teenager’s and often even adults’ wardrobe. In this article, we will show you how to sew a cap step by step. We have prepared a video, text instructions with photos and also a complete cut for you completely free to download. You can download the cut at the end of this article. The cut is about size 50 (head circumference), but the cap with rubber is quite flexible and will definitely fit a few centimeters smaller or larger on the head. If you need a cut for a larger or smaller head, improvise 🙂
We recommend that you watch the video before you start sewing, because photos and text may not always capture the process.
How To Make a Baseball Cap For Kids | FREE PATTERN | Sewing tutorial
Download pattern:

Material:
Cap and hem 100% cotton
Iron-on non-woven fabric Ronar Fix (on the reinforcement of the peak)
Rubber width approx. 1cm
How to sew a cap – procedure:
* We recommend watching the video, as everything from the text does not necessarily have everything immediately understandable. Download the cut under the instructions at the end of the article.
- Print the cut and cut out the individual parts. Check that the dimensions in the cut agree with reality.
- Mark the double arch of the cap on the fabric from which you will sew the cap twice and cut it out.
- Also mark a separate cap arch on the fabric twice and cut it out.
- Transfer the peak to the fabric for the cap also twice and cut it out.
- Transfer the peak to the iron-on non-woven fabric once and cut it out.
- Join the two inner hem strips from the cut with adhesive tape so that the total length is 58.2 cm. Then transfer this cut to the fabric from which you want to have the inner hem 1x and cut out.
- Cut out the eraser. Width approx. 1cm, you can also use other widths.

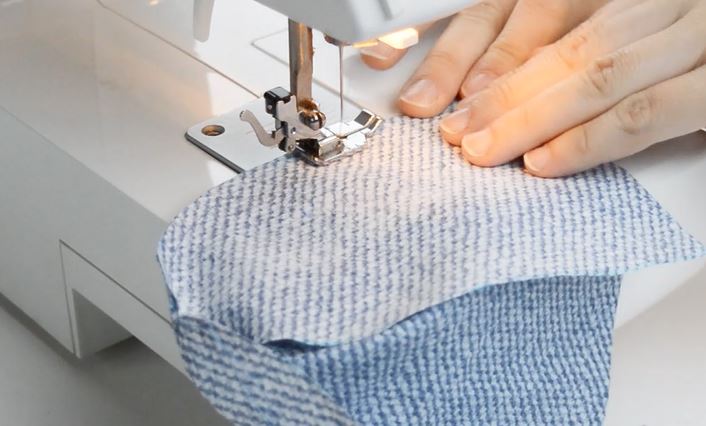
- Take one double arch, fold it in half face to face, and sew a shorter seam of the arch. A straight stitch was used in the video, but you can also use overlock.

- Smooth the just sewn stitch to one side and then sew it with a straight stitch from the front side of the fabric so that the fabric does not stand out.

- Repeat steps 8 and 9 for the second double arc.
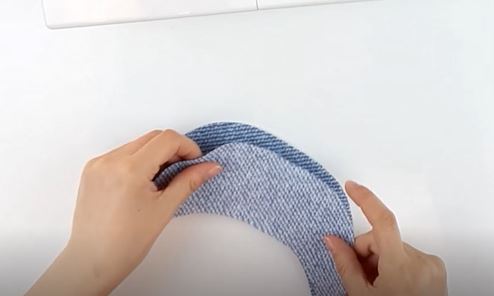
- Take a separate arch and sew one side of it to the double arch.
- Smooth the just sewn stitch to one side and then sew it with a straight stitch from the front side of the fabric so that the fabric does not stand out.
- Sew the second separate arc to the second double arc. Sew it from the same side as in point 11.
- Smooth the just sewn stitch to one side and then sew it with a straight stitch from the front side of the fabric so that the fabric does not stand out.
- Sew the two halves of the cap together and smooth the sewn stitch to one side again, and then sew it with a straight stitch from the front side of the fabric so that the fabric does not stand out.

- Take the fabric on the peak and attach it to the fabric on the peak. Trim the fabric on the side of the cap so that the fabric is 3-4mm shorter than the fabric.

- Place the fabric with the sticky side on the back of the visor fabric and iron it.

- Place the second fabric for the peak face to face with the fabric and sew a longer arc.

- Turn the fabrics upside down and flatten and flatten the edge of the peak.

- Sew again a longer arch of the peak approx. 3-4mm from the edge.

- Pin the peak to the cap from the bottom and sew.

- Take a strip of fabric for the inner hem, fold one longer side approx. 5-7mm backwards towards you and sew.

- Pin the unstitched side of the hem to the cap and sew around the entire perimeter of the cap. You can sew more stitches.

- Sew the rubber to the back of the hem on the back of the cap so that it tightens the cap.

- Pin the hem to the inside of the cap and sew in about half the width.

- The cap is ready. You can decorate it with, for example, buttons, patches, etc.
Download free sewing patternfor baseball cap:

Who of you has never worn a baseball cap? Today, a baseball cap is an integral part of every child's, teenager's and often even adults' wardrobe. In this article, we will show you how to sew a cap step by step.